Showing posts with label family room. Show all posts

Tuesday, February 3, 2015

Tips On Painting French Doors

Ahhh.  French Doors.  They really can class up a space.  Our painted black beauties were like the icing to our family room cake.  I think the French would say that they bring a certain 'je ne sais quois' to the room.


I am so excited to finally bring painted black doors to our new house.  This is one trend that I just didn't have the balls guts to do in the past.  But man oh man... I'm sure glad I did.  And now I'm not sure how I'm going to stop myself from painting all interior doors black.  HELLO DRAMA!

We considered ourselves pretty lucky that these doors were already here.  It's the one piece of hardware that we actually kept from the original room.  Our choices were to keep the track lighting or the french doors.  Man, I miss those track lights. #notreally

Let's take a look back at what the doors looked like pre-gut.


Here they are again after we slapped on a bit of paint (and did a few other things) in the family room.  Snoozefest by the doorway, right?


Then... BAM


It's just magic I tell ya.

By the way, the paint color from the two above pictures is the same (Benjamin Moore - Thunder).  It looks brown at night (with LED lights) and gray in daylight.  Crazy how paint can change so much with different lighting.

Let's talk about how we transformed those beauties.  And I may throw in a little timesaving tip for you... because I learned a pretty valuable lesson while painting these suckers.


1) First, we removed the doors from the brass hinges.  We also removed the knob hardware since we planned to replace them with something more fitting.  Then we laid these guys flat on a dropcloth so we could paint with no fear.  Fear of drippage, that is. 

2) We lightly sanded the doors to create a smooth and sleek surface for the final coats.  There were a few existing paint drips on the white side of the door; I removed these drips using the same process that I used when I painted the kitchen cabinets.  We vacuumed and wiped the doors clean, then took 3 hours to carefully tape each pane on both sides of the door.  3 hours.  Let me repeat that, it took me 3 hours.


So, we're clear that it took me 3 hours of non-stop taping, right? Waste. of. time. I would rather watch 3 hours of golf than tape these doors again.  

Errr, I take that back.  I would rather tape.  


3) Finally, I brushed on 3 light coats of black paint (allowing each coat to dry 6-8 hours before reapplying) and then removed the tape after allowing the final coat to dry.

Let's put on the brakes right here.  STOP!  Do not follow the instructions above.  Delete that tutorial from you brain.

I made a mistake.  Yup, I'm human.  And I didn't google "how to paint french doors."  Otherwise, someone else would've warned me that taping french doors prior to paint is a huge, massive, very large waste of time.


Because no matter how good you think you are at taping, and no matter how expensive the tape is, you'll still get unpainted spots, and paint leakage under the tape.  I'll never get those 3 hours of taping back.  3 hours. of. taping.

I used my window scraper to remove the bits of paint that creeped below the tape, and that's when it hit me.


You don't need to tape windows when painting them!

Let's start this tutorial all over again.

1) Remove the hardware (knobs and hinges).  Or don't if you like the look of messy painted hardware.

2) Watch 3 hours of golf.  Crack open a beer.  Whatever you do, do NOT tape the windows.

3) Load your brush up with paint, and brush on as many coats as you would like.  Get paint all over the window if you please.  Write your name, let the dog stamp their paw on the window...


4) Then take a window scraper (read: straight razor) and grab your beer.  Wait!  Let the paint dry. Because dried paint comes off like butter!


But even better than butter.  Just in case you've never scraped paint off a window, it's soooo satisfying.  It's kinda like rolling dried rubber cement into balls.  I could have scraped this paint all night.  But we ran out of beer thankfully, it only took 20 minutes - which was much less time than taking 3 hours to tape.


4) Clean up is a breeze.  Grab the vacuum with a soft attachment to catch all the paint curls and some spray cleaner for the windows.


That's it.  You can have freshly painted french doors in a few hours.

We rehung the doors with oil-rubbed bronze hinges, and added new dummy doorknobs.  We used dummy knobs because the doors don't latch together.  They use a ball catch on the top trim.  It's not an ideal way to close the doors, but it was already there and these doors are only closed when we leave the house (to keep little four-legged friends from entering).


And now, these doors are fancy and suave.  They almost speak with a French accent "welcome to ze room.  No, REMOVE THE SHOES!"  


Oh yeah, we also (finally) wrapped the supporting beams. We are still contemplating finish options for those... but they're looking quite beefy :)


Next up... let's do something about those tulip sconces. 

 
{Thrifty Thursday Link Party} - Thank you for reading!  Click that link to head back to Living Well Spending Less blog.
{Home Stories A to Z} Link Party - Thanks for visiting!

Monday, January 12, 2015

Family Room Reveal

I've made you all wait long enough, so here's is the official "to date" update of our family room addition.  Come on in and make yourself comfortable.


The temporary drapes have been removed and this room is looking less like a bachelor pad, and more like the space we dreamed about.


So go ahead, grab that knitted blanket and stake your claim in that cozy corner


This is the place I settle into when I finally get around to catching up on my past 8 months of magazines. 


Or when we the guys want to catch a game.


It's the perfect spot to converse with friends. 


Or play a lazy game of  backgammon.


Don't tell the other rooms in our house, but this is my favorite update.  Ever.  Which is why the woven chairs from the sunroom packed up their pillows and moved over here.


The table is a perfect addition to the new room.


And the perfect spot to kick up your feet.


That is, if your legs are long enough.  If you're 5'2" like me, then they won't extend past the edge of the couch. 


I wish we could say that we are complete with this space.


But, just like a teenage girl's Facebook selfie, I worked the camera angles.  We are actually only about 70% done. 

 
I still have to hem the curtains. 
 
 
Build the wet bar (the alpine trees are hiding the roughed-in plumbing).  And cut in the attic access above the french doors.
 
 
Install steps (and a patio) outside.  We also have to add trim to the exterior of the sliding door... and rebrick the area where we removed the window.


We still have to wrap the roof trusses in a fancy wood finish.  And create a natural privacy barrier on the side yard.  This will give both our neighbors and us more privacy.
 
 
Finish up the closet space (drywall, install shelves and tile, and finally install the closet door and trim).  We originally wanted to place a media console below the TV - but we've decided that maybe a gas fireplace would help maintain a warmer environment in this room.  That feature blows our budget, so we'll wait a year or so to do that.

Here's a breakdown of what we have left to do...

Interior:
- install tile in closet space
- drywall closet space and create shelves
- trim and install closet door 
- wrap exposed beams in fancy wood finish
- update furnace, because with out a bigger furnace ours isn't strong enough to heat this room (it's about 6+ degrees colder than the rest of the house).  We run a space heater when we use this room which works really well, but this is definitely not a long term plan. 
- make an end table
- install window shades on front window (these are on order)
- install fireplace below TV
- build wet bar

Exterior:
- plant privacy greens or privacy fence on other side of the window
- create a hard surface patio area outside sliding door
- rebrick window opening
- trim out exterior of sliding door

Do you remember what this place looked like?


And after.


And one more time...


Source list:
Rug - RugsUSA
Sectional - Crate & Barrel
Woven Chairs - Pottery Barn
Bamboo Shades - JC Penney
Drapes - Ikea
Drapery Rods and Rings - Ikea
Pillows - Pottery Barn, TJ Maxx, and Crate & Barrel
Tile - Troy Tile
Trim, Casing, and Accent Wall - Home Depot

Friday, January 9, 2015

Herringbone and Tile and Sickness

Happy Friday! Let's talk about flooring today.  We shared a little update on the new family room last month in this post.  Time to share some details and show you how our vision came together. 

When the time came to choose a floor for our family room we considered all options. I had been mulling over flooring options since we bought our house; now we had to make a decision.  That's like putting me in an aisle of chocolate candy and asking me to pick one thing.  BUT I LOVE THEM ALL!


Here's the breakdown of what we considered:
 
1) Most Expensive.... Hardwood Floors - we love hardwood floors, especially because we usually hire out the installation/refinishing.  It's pretty easy to write a check.  Because we already have hardwood throughout the rest of our house, this choice would allow the dining room to seamlessly flow into the family room.


2) Middle of the road.... Tile - The flooring in this room is built over top of a slab (ultimately...the slab is 18" below the floor), and tile would be cold.  On the other hand, tile lasts forever if it's maintained properly.  We would install the tile ourselves so this option would be the most work for us.


3) Least Expensive... Carpet - the easy way to go.  It's soft, cozy...and installed by someone else.  That sounds incredibly inviting.  But it's not easy to design around.  And it would probably have to be replaced in 5-10 years.

Can you guess what we chose?


We chose tile because of it's longevity, price, and design.  Our idea was to use a black slate and create a beautiful, timeless pattern that would make this room stand out from the rest of the house.

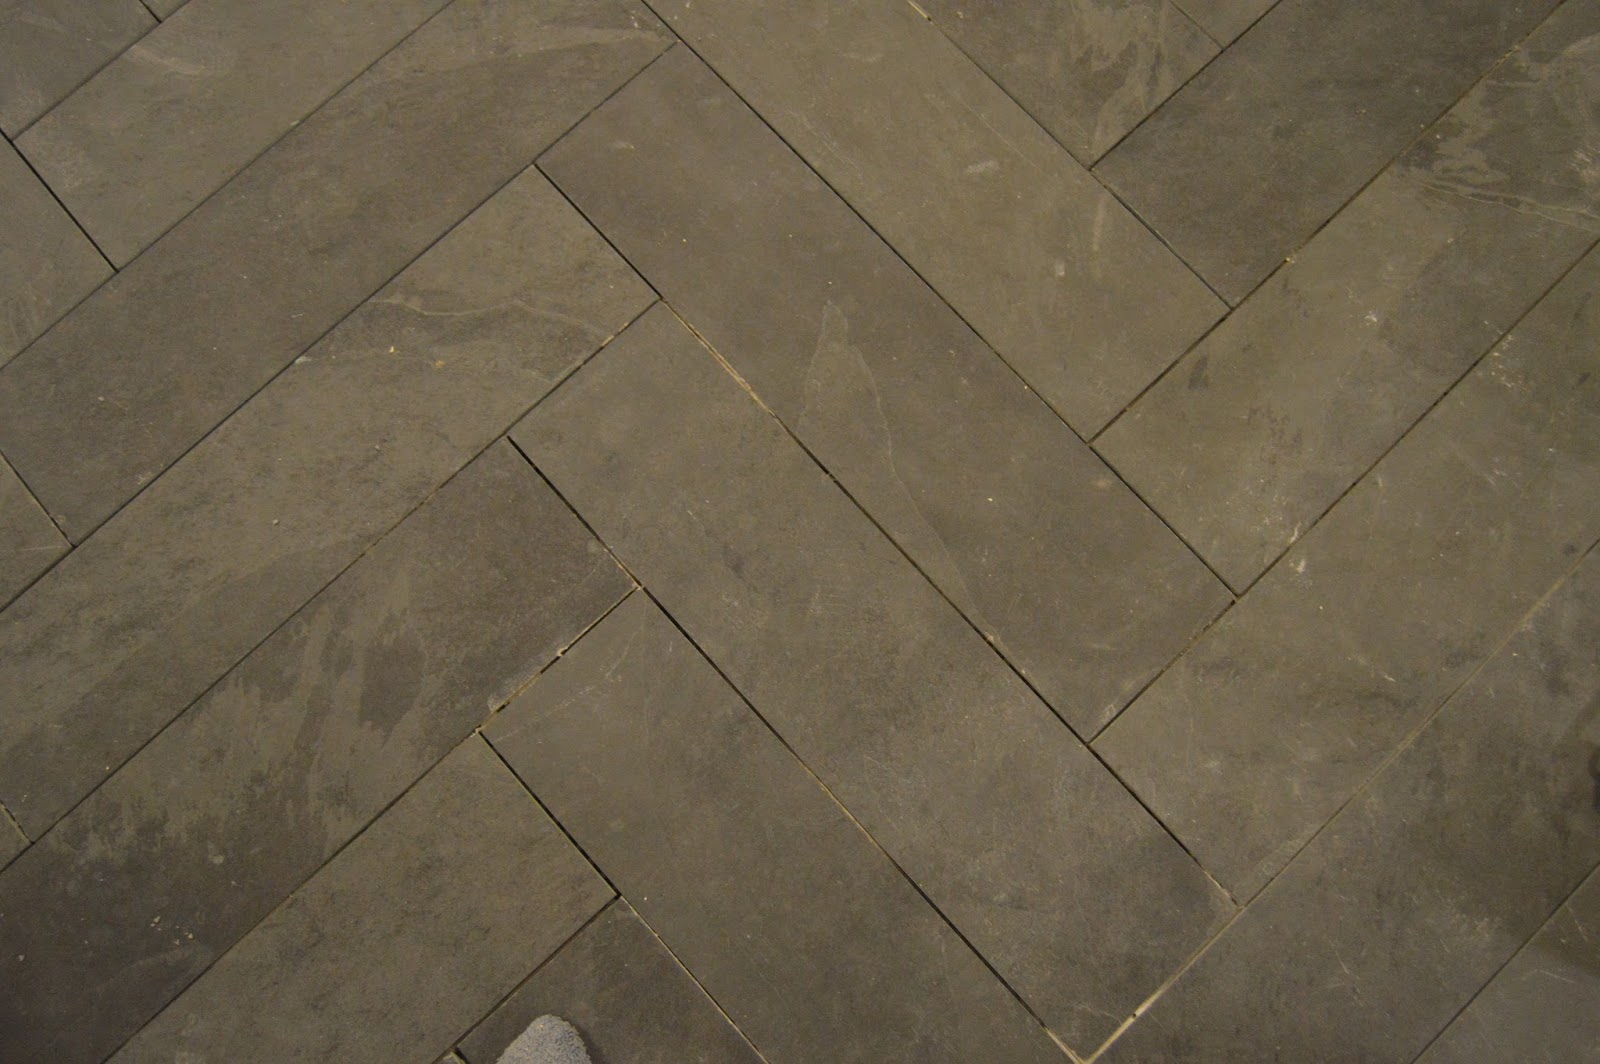
After much searching, I tracked down this gorgeous 6" x 24" slate plank.  And the price was right.

For dramatic effect (cue the oohs and ahs) here's a shot of the before. 


And with a little bit of fairy dust... 


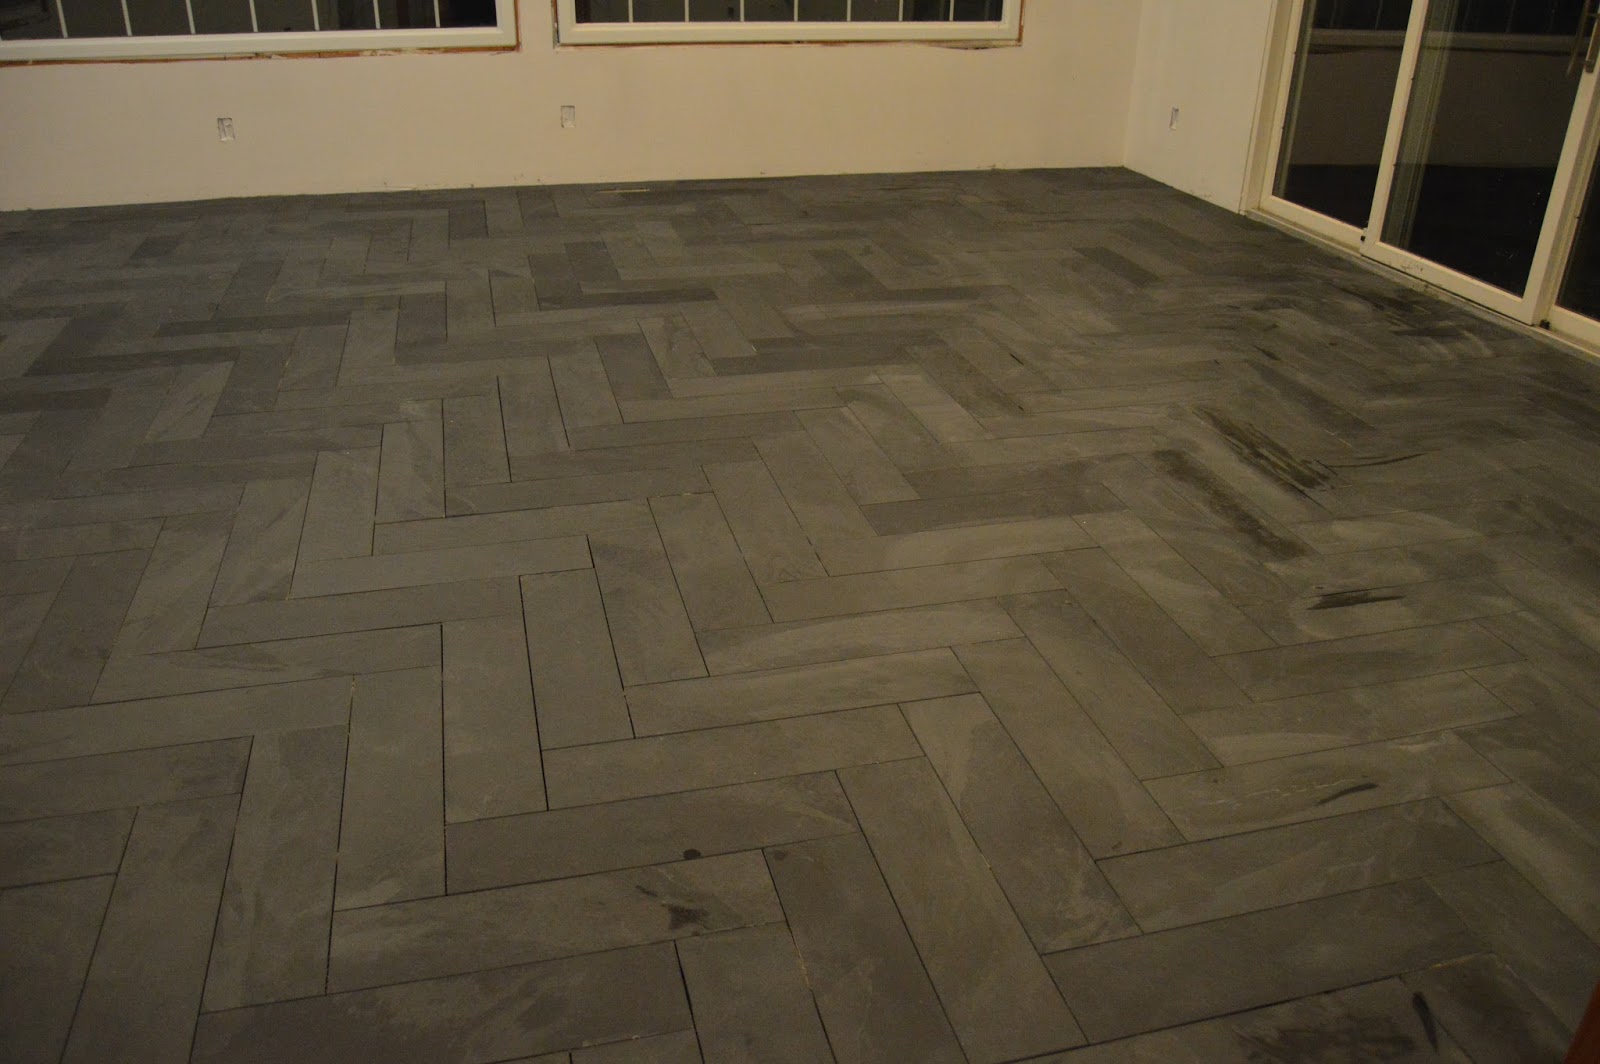
That's 420 square feet of slate herringbone love...ungrouted, of course.  
 

Finding a black slate tile was difficult to say the least.  I stalked many websites and tile shops looking for my vision. Lowe's carries a slate tile look-a-like (that's actually porcelain) called Ivetta Black.  Porcelain = less maintenance (and cheaper, too).  But I don't know what marketing person considered this tile "black."  There was gray, green, and red tones; definitely no black... just some kind of crazy glitter effect.

You can see the difference in tiles above.  The top 7 tiles are the Lowe's version from one box.  The bottom 3 tiles are the natural Montauk black slate that we ended up ordering.


Now we just had to decide how to install it.  A 45 degree angle from the entry...


...or 90 degrees wall to wall.


There's some major decision making going on here...


I realize that from this picture, it looks like we made Jimmy do all the work.  But I promise, Jimmy only put on knee pads for the picture.  He sat back with a beer and watched us work.  Not really... he spread the thinset and we laid the tile.

The 45 degree option seemed like it would be the most dramatic.  However, that would require cutting a minimum of 160+ tiles around the perimeter of the room (since every tile touching the wall would need an angle cut) and we would have more tile waste.  No. Thank. You.  That made our decision easy.  We ran the tiles from wall to wall at 90 degrees so we only had 60 cuts  (where the pattern ran into the walls)  and we had very little waste.

Our plan was to run the tile pattern off the angled wall to keep the flow of the room the same. The tiles are running about 45 degrees off the wall.


So it ended up looking like this...


We're getting ahead of ourselves again.

First, we had to lay the tile. Which took us 2 days.  The first day we laid all the full tiles, then the following day we went through and made the special cuts.  


After two full days of work, we had a really fancy looking floor.  


Installation of this size was pretty tedious.  Tile is heavy for one thing, and since we were working with a natural stone, we also had to deal with varying degrees of thickness in the tiles.  This meant that we had to be conscious not to place an abnormally thick tile next to an abnormally thin one.  All in all though, the tile was fairly consistent and we only tossed 3 tiles.

After we finished laying the tile (the main part of the room had set for 24 hours) we spread on the first coat of sealant.
 
Apparently, sealing porous stone before grouting makes the haze clean up easier later.   


We used the DuPont stone sealer (with out enhancer).  I didn't want the sealer gathering in the spaces between the tile, so we spread it on with foam rollers so we had more control over the coverage. 

Then we got our grouting thang on.


Oh how I hate to grout.


Justin and I started grouting at 7pm on a Monday night, and I refused to go to bed until the grouting was done.  We finally turned in at 3:30am and got approximately 3 hours of sleep before we were up for work the next day.  #slavedriver


After the grout dried for 24 hours, we started to put the final layer of sealant on the floor.  This is where it gets bad, folks.  So bad...

The floor was more gray than we wanted after the first coat of sealant, so we looked into enhancer.  But, I didn't know if we could change the type of sealant in between coats.  So, I called DuPont directly and spoke with a help advisor regarding their products.  I explained what product I already used on our floor pre-grout (DuPont Stone Premium Sealer - water based), and I asked if I could use their Enhancer and Sealant (DuPont Stone Sealer and Enhancer - water based) formula over top of their Sealant formula.  The representative told me YES this was possible.

So, with all the confidence in the world, we spread on a second coat of sealant, but this time we used the Enhancer and Sealant formula.  You can see the difference between a sealed floor and an enhanced floor by looking a the picture below.  Take one last look at the beautiful, flawless grout lines.  

 
How much do you love Justin's work outfit? Hands off ladies - that stud is mine!  We are also not Ohio State fans at all.  I'm not sure why he even owns these.  Just note that these are his painting shorts.
 
Well, the representative I spoke with at DuPont was wrong.  Wrong in so many ways I could cry.  You definitely cannot, in any way, put enhancer on top of sealant.  
 
After the second coat of sealant dried, my stomach hit the floor.  It was like we had taken 2 lbs of butter and rubbed them all over our floors.  Why was the employee at DuPont wrong? Because there was already a layer of sealant, the enhancer couldn't soak in so it just laid on top like an oil slick.  This is how shiny our floor was after spreading on the Enhancer and Sealant.
 
 
Fear immediately set in, and we started mopping the floor with a mixture of dawn soap and water.  It took away the oil slick feel, but the damage was already done. The grout lines were ruined.  I've never wanted to turn back time so bad as I do today.  We put so many hours (and money) into our floor and I just ruined them in a matter of 10 minutes.

This is what they look like today, after a few rounds of mopping.


The tiles look just fine, but if you look closely at the grout lines, the beautiful light gray now has variations of darkness in it.  And that just makes me sick to my stomach.  I'm not putting the blame on the worker who took my call that day.  I should have called the tile shop and directed the question towards the owner, I should have looked online.

We all make mistakes.  This one just goes in the books as one of my biggest homeowner mistakes ever.  I believe that we can strip the floors and reseal them correctly, but I don't think it will give me the results that I want since the grout is what I'm most disappointed about.

I'm still waiting for my knight in shining armor tile aficionado to explain a way I can restore my grout lines.  And that's really all I have to say for now... I'll leave you with this before and after (3 days post mopping extravaganza).  And maybe one day I'll return with good grout news!


We still have about 60 square feet of tile remaining from our original purchase.  Up next, tiling the closet space behind the TV angled wall and maybe even tiling the hearth of our fireplace in the living room.  At least I won't be making the sealant mistake again...  
Related Posts Plugin for WordPress, Blogger...