Showing posts with label Hallway. Show all posts

Monday, May 11, 2015

Hallway Gallery Wall

Hi guys! We're baaaack! We took a bit of a blogger hiatus during the month of April to prepare our home for our annual get-together with friends. Then we took a little time out and refreshed our minds with a quick weekend vacation out of town. Have you all been busy too? It's so hard to stay focused on weekend house work when the weather is just beckoning to be enjoyed! I'm loving this sun and warm rainy days! 
 
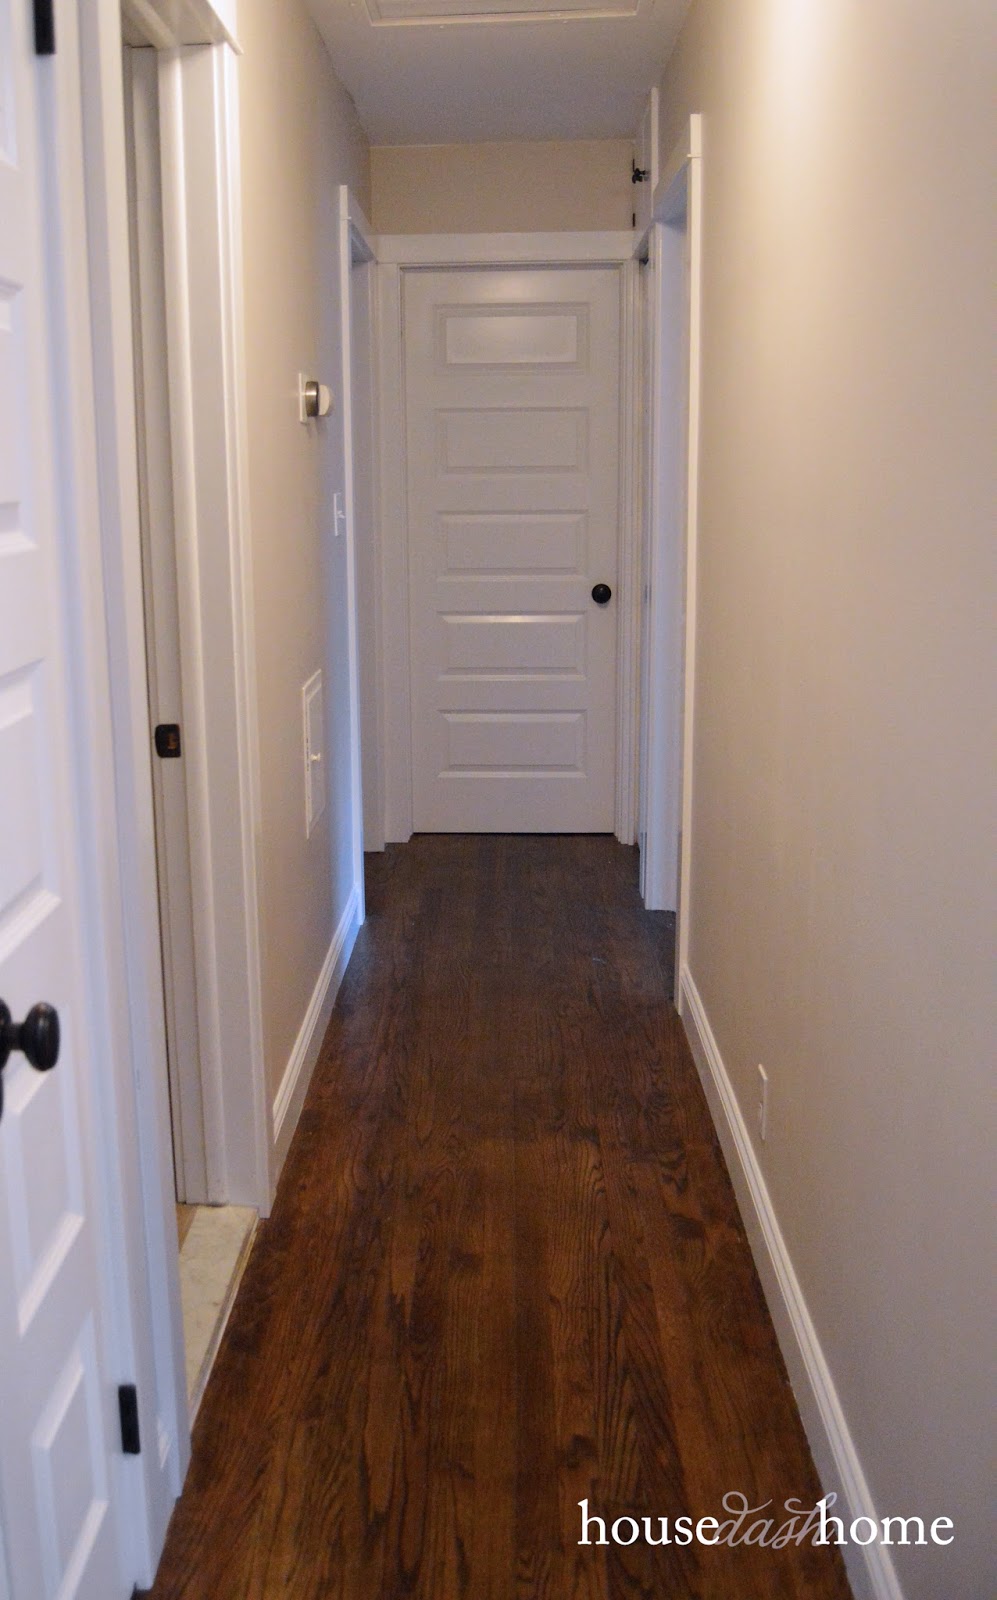
We're still hard at work in our hallway trying to make it more inviting. So far, we've refinished those hardwood floors, added new baseboards and chunky casing, updated the lighting, painted the walls in Ben Moore's Edgecomb Gray, and updated the interior doors.
 

The long, boring walls were having a Taylor Swift problem (ahem...blank space), so we corrected that by adding a gallery wall. This took us a month to put together. But, it's finally done!


Most of the artwork (or frames) in our house is of the botanical or animal nature. In fact, I only have two personal pictures prior to creating this massive picture wall.


This was a great excuse to actually dig through all of those travel and wedding photos in Shutterfly and finally print a few!


A gallery wall can be complicated and frustrating. There's a variety of methods of methods out there to that gallery wall madness... taping silhouettes of the frames to the wall, laying out the frames on the floor first, framing them out in painters tape,etc. I like my method the best. It requires only a little bit of Photoshop skills, and some experience in shopping. I've got both of those down.

First, I drew my fake wall. Complete with baseboards, door casing, and the doorbell. I wanted all my frames to create one large shape, so I drew a rectangle to work within.

Then I filled in my 'frames.' I started with the big rectangular shape in the center and worked my way outward until I liked the layout. I did not measure, I just used my good 'ol common sense to create common sized frames.

I only had one frame that I already owned (the rectangular one in the upper left hand corner), but everything else had to be purchased. I printed out my layout and headed to Michael's and Ikea. Then I grabbed about 2 dozen frames between the two stores and started putting them together. I wanted the frames to be complimentary and uniform - black frame, white matte - with a variety of frame styles. I came across the gold frames at Ikea and grabbed three to liven up the space a bit.


The blue outlined frames are from Michael's and the yellow ones are from Ikea. Ikea had the best price on frames overall, but they only had 2 different styles so we had to mix it up a bit. We used 3M Command picture hanging strips to hang up the smaller frames. The biggest frames were hung on a screw with picture wire. Which will definitely save time with spackling holes in the future!


Three holes in the wall, two trips to Michael's and one visit to Ikea (not counting the extra-frame returns) and the gallery wall had come together.


I love the black frames with the touches of gold, yet it is a large gallery wall in a tight space. So we decided to keep the pictures black and white to not overwhelm the walkway. We waited until the gallery wall was finalized before we ordered up the images. The pictures that we chose to use ended up being a variety of our favorite memories... scenery from our travels, engagement, wedding, friends, and family photos.


Our door bell lays in an unfortunate spot right in the middle of our gallery wall. I painted the cover using leftover Edgecomb Gray paint to make it a little less offensive. It doesn't even bother me anymore!


One very special quote is at the center of it all. This lovely reading was specially chosen to be shared during our wedding ceremony before we exchanged our vows. It is a beautiful quote from Charlotte Bronte's timeless novel, Jane Eyre.


That quote is my favorite part of our new wall.  And the best part? It took me minutes to paint.


I love that this frame wall holds so many special memories for us. I can see it from the kitchen and from our bedroom and will often stop to glance and smile at these beautiful memories of ours. I'm sure these pictures will change a hundred times over the years - but isn't that the fun part to watch lives grow and make new happy memories?


Do you have any folders in Shutterfly waiting to be dusted off and hung on the wall?

Thursday, April 23, 2015

Updating Interior Doors

It's been quiet over on the blog lately, and I'm so sorry for that! It's been a combination of being slammed with work, the nice Michigan weather, about 12 different running projects, and a case of writers' block.

We treated ourselves to a full Saturday off this past weekend - we spent the day brunching at a restaurant we've been wanting to try (Dime Store in Detroit for any of you locals), attending a Tiger's game, lunch at two iconic coney places (Lafayette and American), and we capped the day off with a party to celebrate a lifelong friend. It was so nice to get out and enjoy a weekend, but it always makes me feel guilty for not working on the house. Especially since we have our annual trip to Nashville coming up. (Which means y'all will get an update on my brother and sister-in-law's lake house!)

Curious as to who won the coney dog showdown?? Lipuma's. ha.

One of our goals for this year was to update our interior doors, bifolds and hardware. And I'm so excited to cross this one off our to-do list!

The doors original to the house were plain, hollow-core, and dingy with corroded brass knobs and hinges. They have definitely been well loved throughout their life.


Several of the door knobs had worn so bad that they no longer functioned properly. Which was a bit scary when you couldn't open the bathroom door to exit. It took a few tries to get the latch to open and we always hoped it didn't stop completely on our turn in the 'loo.

As for the door style... we already had that picked out. You got a glimpse of the door when we added a pantry to our kitchen during that whole-room renovation last year.


Yup, that's what we installed throughout the rest of the house. We just love those traditional style 5-paneled doors. I've been wanting them forever and I'm so excited to have some fancy-schmancy solid cores!

At this point, we focused on replacing just the interior swinging and bi-fold doors on our main level (we aren't even thinking of basement doors, and exterior doors are for another day). Here's what we are replacing at this time:
  • 4 solid-core door slabs (guest bathroom + 3 bedrooms)
  • 2 hollow-core door slabs (hallway coat closet)
  • 2 hollow-core bi-folds (linen closet + family room closet)
  • 2 sets of double hollow-core bi-folds (2 spare bedrooms)
We knew the fancy solid-core style would also boast a fancy price tag, but we felt it would be worth the extra pennies. Our little ranch has all hard-surface floors, so noise travels pretty well from room to room. While that's not much of an issue for us now, it may be in the future once there are more than two adults living here. In addition to our solid-core request, we also need the doors custom-sized. Because that's how our house rolls. #oldhousestyle

Like in the past, I gathered up 3 quotes for our custom doors from the following stores:
  • Building supplier
  • Local home improvement store
  • Lowe's
The styles of the door varied slightly from store to store, but they were all consistently 5 'raised' paneled doors that were pre-primed, and all were special order. We would handle delivery, painting, installation, and hole cutting (for the handles).

I was hopeful that the local guys would win our business once again (like on the garage door and carpet). Until I got that first quote back and saw more digits than I expected.
  • Building supply store - $2,600 <-----------whoa!
  • Local home improvement store - $1,680  <--------not quite
  • Lowe's - $874 <--------Sold!
Lowe's quoted us for the win! Of our interior door biz...

Lowe's was able to accommodate our special requests for custom sized door slabs (length, width, and depth) and they applied two savings programs which brought the doors into our three-digit budget. We got a free upgrade from hollow-core to solid-core on all of our swinging doors, and 10% chopped off the total order (with a direct mail coupon). AND we got all hinges routered out to our specs for free. I'm not sure if this is always free at Lowe's, but we had to pay at the other stores for this service.


Fast forward 4 weeks and our new doors were down in our basement propped up on 2x4's just waiting for a fresh coat of paint. I used my paint sprayer to lay on 3 coats of Benjamin Moore Simply White in semi-gloss (the same color as our trim) on each side.
 

While assessing the installation process, we noticed that our bathroom door wasn't fitting because the door jamb wasn't square. And the door wasn't going to bend for us.  That's when I called in the pros to hang the door slabs. We waited too long and spent too much money for me to hack this door to size. And a mistake on the door couldn't be covered with caulk. A few hours later our contractor sized up the doors, trimmed only one and hung them to the jambs.


Remember our office update? Here's the other side of the room now that we have doors! The trim was just installed and still needs to be painted. Other than that small fix, the office is done.


New doors make such an impact!  Take a look at our coat closet. One of the first things you see when you walk through the front door.


We kept the double door design, added new doors, hinges, and installed dummy knobs to match the rest of the hallway's hardware.


We decided to go with Baldwin knobs (from Home Depot) for all the interior doors since they'll likely be used daily throughout their life. The price tag to purchase each knob is a little higher, but we only needed 4 functional door knobs and 2 dummy knobs so it definitely didn't break the bank!

Baldwin makes a superior product, but just in case, they have a lifetime warranty which we've tested twice now on an exterior entry door. One of our door handles is 20 years old and was showing signs of wear. We reached out to Baldwin for two different parts and they sent us both free of charge (it works perfectly again).

I'm a fan of fantastic customer service - and Baldwin now has a customer for life. You can find the knobs that we purchased by visiting here.


We used oil-rubbed bronze cabinet pulls for the bifolds (from Lowe's).


I can't tell you how happy I am to have brand new interiors doors! I think we'll be loving these forever since they're so classic looking. What do you think? Do you have a favorite style of door?

Thursday, April 9, 2015

Earning Our Stripes

Our to plan to update our interior doors has been delayed. Well, technically, they're about 90% done. Still not done done. But oh my gosh, we almost have new doors

We ordered custom-sized door slabs with pre-cut hinges from Lowe's to replace all of our interior doors and closet bifolds. So I assumed that all I had to do was paint the doors, square out the routered hinges (the factory cuts rounded hinges and our door jambs have squared hinges), hang the door, and cut the hole for the door knob. Easy peasy... right?

I should know better than to assume a project could be so simple.

I forgot to take into account the unique characterists of our home. Like how nothing is ever square.

Trying to fit a heavy, perfectly squared door into a not-so-squared door way is like trying to fit a square peg in a round hole. It ain't gonna happen. I'll spare you the gory details for now...

The doors aren't the only item we are replacing. The whole hallway is getting a makeover! We have already updated the trim in the hallway - base molding and door casing. And we're anxious to add crown molding (especially after adding it to the new office space). So that'll be done in the near future. We'll wrap up those doors first before we add the crown.


Anyway, this whole delay has forced my focus to the décor.  More specifically, the floor. We haven't had a rug in this hallway since we moved in, and it's looking dangerously more like a cold doctor's office than a cozy home. This space needs some character... stat.


The wiener dog adds some personality to the space. But not so much as an accent color since he blends in with the floors. Besides, the little bugger doesn't keep still so we're looking for more permanent fixtures.

Our small hallway is only about 14' long; which might sound long, but when it's broken up by 6 doorways it really makes the space feel quite cramped.
 
Now, what design can trick the eye to make a stubby hallway seem longer?

Stripes!  

Our new plan is to paint our walls in long black and white stripes. And that Dash and Albert rug will go perfectly with the new feature on the walls. 

Okay, I'm kidding. 

The striped space is a little over the top for our home, but it does prove the idea that stripes can draw attention down the room and keep the eye moving.

We can achieve the same effect just by adding a striped rug with lines running parallel to the long walls. There are endless varieties of striped rugs:

Soft colored stripes...

 
Nautical stripes... helllllo gorgeous stairway!    
 
 Neutral stripes...


Dark stripes...
 

 Multi-colored stripes.
 
bookcase lined hallway with striped runner by SR Gambrel
(Source)
Wide stripes.  

 
Skinny stripes. 
 
 
Medium stripes.
 
 And multi-width stripes...
 
 
That last rug is my favorite. Now I just need to find it. Anyone know where to buy it?
 
Next up... we'll be sharing some interior doors.  Does it get more exciting than that??
Related Posts Plugin for WordPress, Blogger...