
When the time came to choose a floor for our family room we considered all options. I had been mulling over flooring options since we bought our house; now we had to make a decision. That's like putting me in an aisle of chocolate candy and asking me to pick one thing. BUT I LOVE THEM ALL!
Here's the breakdown of what we considered:
1) Most Expensive.... Hardwood Floors - we love hardwood floors, especially because we usually hire out the installation/refinishing. It's pretty easy to write a check. Because we already have hardwood throughout the rest of our house, this choice would allow the dining room to seamlessly flow into the family room.

2) Middle of the road.... Tile - The flooring in this room is built over top of a slab (ultimately...the slab is 18" below the floor), and tile would be cold. On the other hand, tile lasts forever if it's maintained properly. We would install the tile ourselves so this option would be the most work for us.

3) Least Expensive... Carpet - the easy way to go. It's soft, cozy...and installed by someone else. That sounds incredibly inviting. But it's not easy to design around. And it would probably have to be replaced in 5-10 years.
Can you guess what we chose?
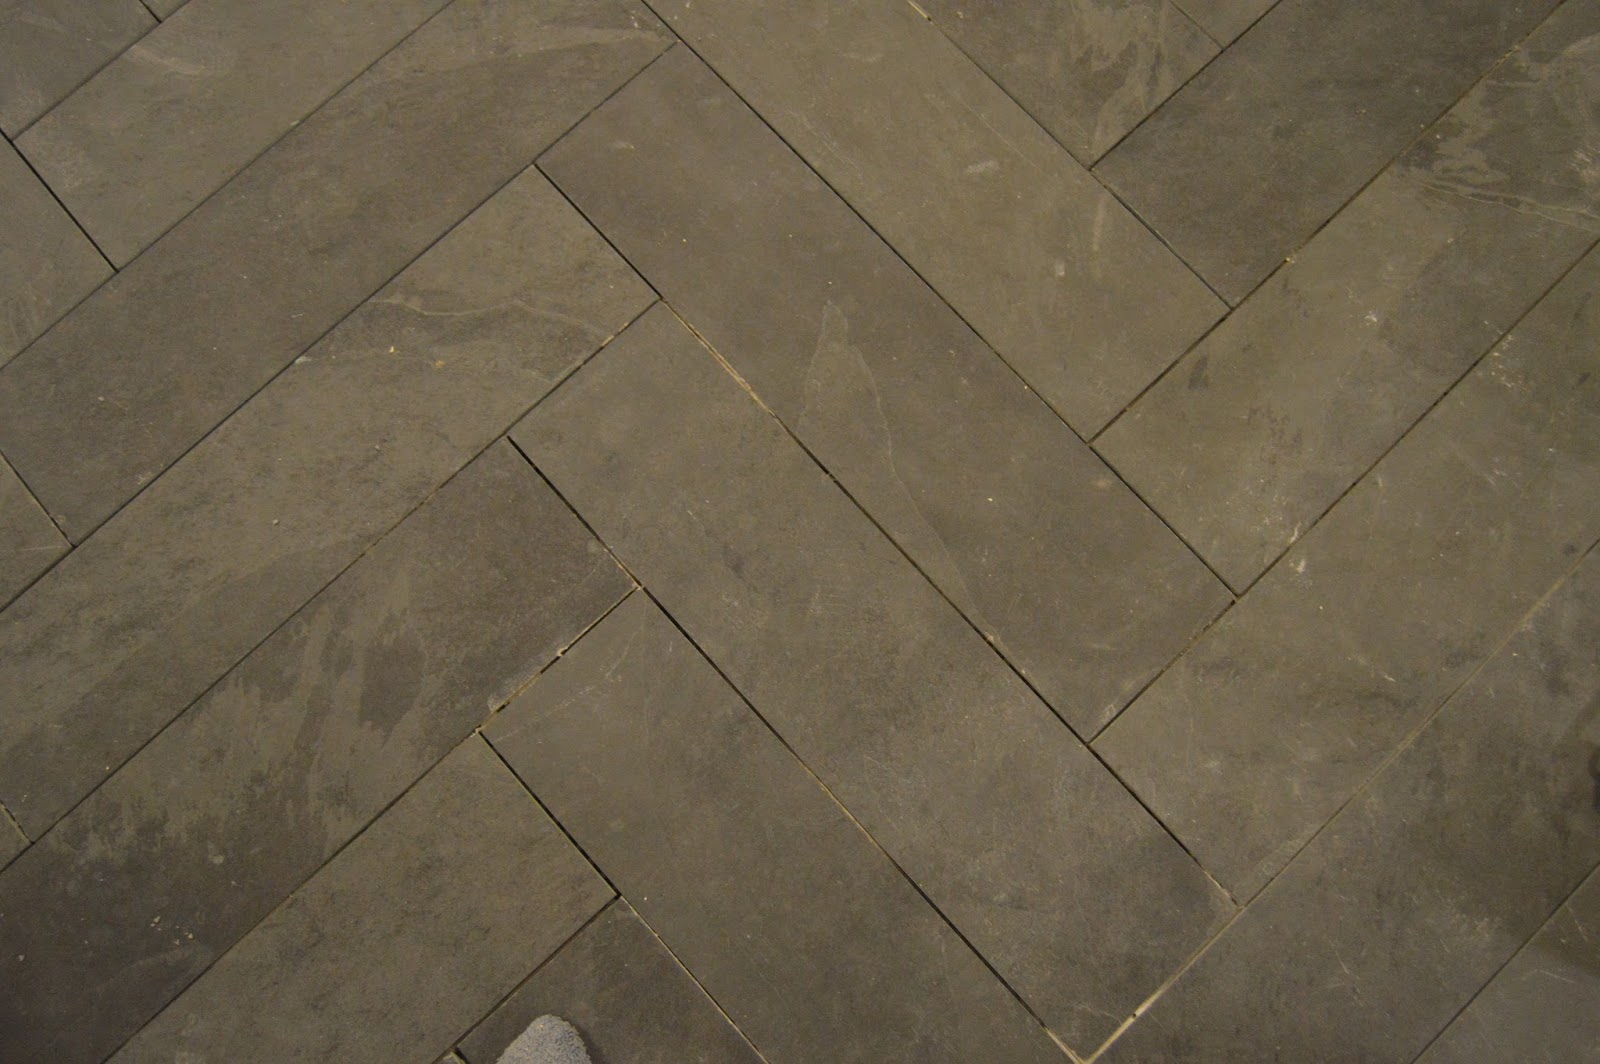
We chose tile because of it's longevity, price, and design. Our idea was to use a black slate and create a beautiful, timeless pattern that would make this room stand out from the rest of the house.
After much searching, I tracked down this gorgeous 6" x 24" slate plank. And the price was right.
For dramatic effect (cue the oohs and ahs) here's a shot of the before.

And with a little bit of fairy dust...

That's 420 square feet of slate herringbone love...ungrouted, of course.

Finding a black slate tile was difficult to say the least. I stalked many websites and tile shops looking for my vision. Lowe's carries a slate tile look-a-like (that's actually porcelain) called Ivetta Black. Porcelain = less maintenance (and cheaper, too). But I don't know what marketing person considered this tile "black." There was gray, green, and red tones; definitely no black... just some kind of crazy glitter effect.
You can see the difference in tiles above. The top 7 tiles are the Lowe's version from one box. The bottom 3 tiles are the natural Montauk black slate that we ended up ordering.
Now we just had to decide how to install it. A 45 degree angle from the entry...

...or 90 degrees wall to wall.

There's some major decision making going on here...

I realize that from this picture, it looks like we made Jimmy do all the work. But I promise, Jimmy only put on knee pads for the picture. He sat back with a beer and watched us work. Not really... he spread the thinset and we laid the tile.
The 45 degree option seemed like it would be the most dramatic. However, that would require cutting a minimum of 160+ tiles around the perimeter of the room (since every tile touching the wall would need an angle cut) and we would have more tile waste. No. Thank. You. That made our decision easy. We ran the tiles from wall to wall at 90 degrees so we only had 60 cuts (where the pattern ran into the walls) and we had very little waste.
Our plan was to run the tile pattern off the angled wall to keep the flow of the room the same. The tiles are running about 45 degrees off the wall.

So it ended up looking like this...

We're getting ahead of ourselves again.
First, we had to lay the tile. Which took us 2 days. The first day we laid all the full tiles, then the following day we went through and made the special cuts.

After two full days of work, we had a really fancy looking floor.

Installation of this size was pretty tedious. Tile is heavy for one thing, and since we were working with a natural stone, we also had to deal with varying degrees of thickness in the tiles. This meant that we had to be conscious not to place an abnormally thick tile next to an abnormally thin one. All in all though, the tile was fairly consistent and we only tossed 3 tiles.
After we finished laying the tile (the main part of the room had set for 24 hours) we spread on the first coat of sealant.
Apparently, sealing porous stone before grouting makes the haze clean up easier later.

We used the DuPont stone sealer (with out enhancer). I didn't want the sealer gathering in the spaces between the tile, so we spread it on with foam rollers so we had more control over the coverage.
Then we got our grouting thang on.

Oh how I hate to grout.

Justin and I started grouting at 7pm on a Monday night, and I refused to go to bed until the grouting was done. We finally turned in at 3:30am and got approximately 3 hours of sleep before we were up for work the next day. #slavedriver

After the grout dried for 24 hours, we started to put the final layer of sealant on the floor. This is where it gets bad, folks. So bad...
The floor was more gray than we wanted after the first coat of sealant, so we looked into enhancer. But, I didn't know if we could change the type of sealant in between coats. So, I called DuPont directly and spoke with a help advisor regarding their products. I explained what product I already used on our floor pre-grout (DuPont Stone Premium Sealer - water based), and I asked if I could use their Enhancer and Sealant (DuPont Stone Sealer and Enhancer - water based) formula over top of their Sealant formula. The representative told me YES this was possible.
So, with all the confidence in the world, we spread on a second coat of sealant, but this time we used the Enhancer and Sealant formula. You can see the difference between a sealed floor and an enhanced floor by looking a the picture below. Take one last look at the beautiful, flawless grout lines.

How much do you love Justin's work outfit? Hands off ladies - that stud is mine! We are also not Ohio State fans at all. I'm not sure why he even owns these. Just note that these are his painting shorts.
Well, the representative I spoke with at DuPont was wrong. Wrong in so many ways I could cry. You definitely cannot, in any way, put enhancer on top of sealant.
After the second coat of sealant dried, my stomach hit the floor. It was like we had taken 2 lbs of butter and rubbed them all over our floors. Why was the employee at DuPont wrong? Because there was already a layer of sealant, the enhancer couldn't soak in so it just laid on top like an oil slick. This is how shiny our floor was after spreading on the Enhancer and Sealant.

This is what they look like today, after a few rounds of mopping.

The tiles look just fine, but if you look closely at the grout lines, the beautiful light gray now has variations of darkness in it. And that just makes me sick to my stomach. I'm not putting the blame on the worker who took my call that day. I should have called the tile shop and directed the question towards the owner, I should have looked online.
We all make mistakes. This one just goes in the books as one of my biggest homeowner mistakes ever. I believe that we can strip the floors and reseal them correctly, but I don't think it will give me the results that I want since the grout is what I'm most disappointed about.
I'm still waiting for my knight in shining armor tile aficionado to explain a way I can restore my grout lines. And that's really all I have to say for now... I'll leave you with this before and after (3 days post mopping extravaganza). And maybe one day I'll return with good grout news!

We still have about 60 square feet of tile remaining from our original purchase. Up next, tiling the closet space behind the TV angled wall and maybe even tiling the hearth of our fireplace in the living room. At least I won't be making the sealant mistake again...
Oh my gosh Mary! The floor is beautiful! Don't beat yourself up over the grout. it really does look amazing!
ReplyDeleteWow- so i am looking for 6x24 slate look porcelain and came across your site- I didn't read anything just looked at the pics- then when you had the comparison of the lowes tile vs the real slate- I thought they both were real stone!!! I am looking for something lighter though so the lowes tile is perfect! Thanks for posting!
ReplyDeleteHow many sqft did you tile? thnx
ReplyDeleteWe tiled 400 sq feet
DeleteI just found your blog searching for tile. I hope the grout has evened out. We recently hired a grout renewal company to use concrete stain on a tiled counter. It might be worth getting an estimate if it still bugs you. My final not is that your floor looks amazing!
ReplyDeleteThanku for posting this it has def. helped me.And by the way the floor looks beautiful.
ReplyDelete